

Step 1: Create a Riverview for your property
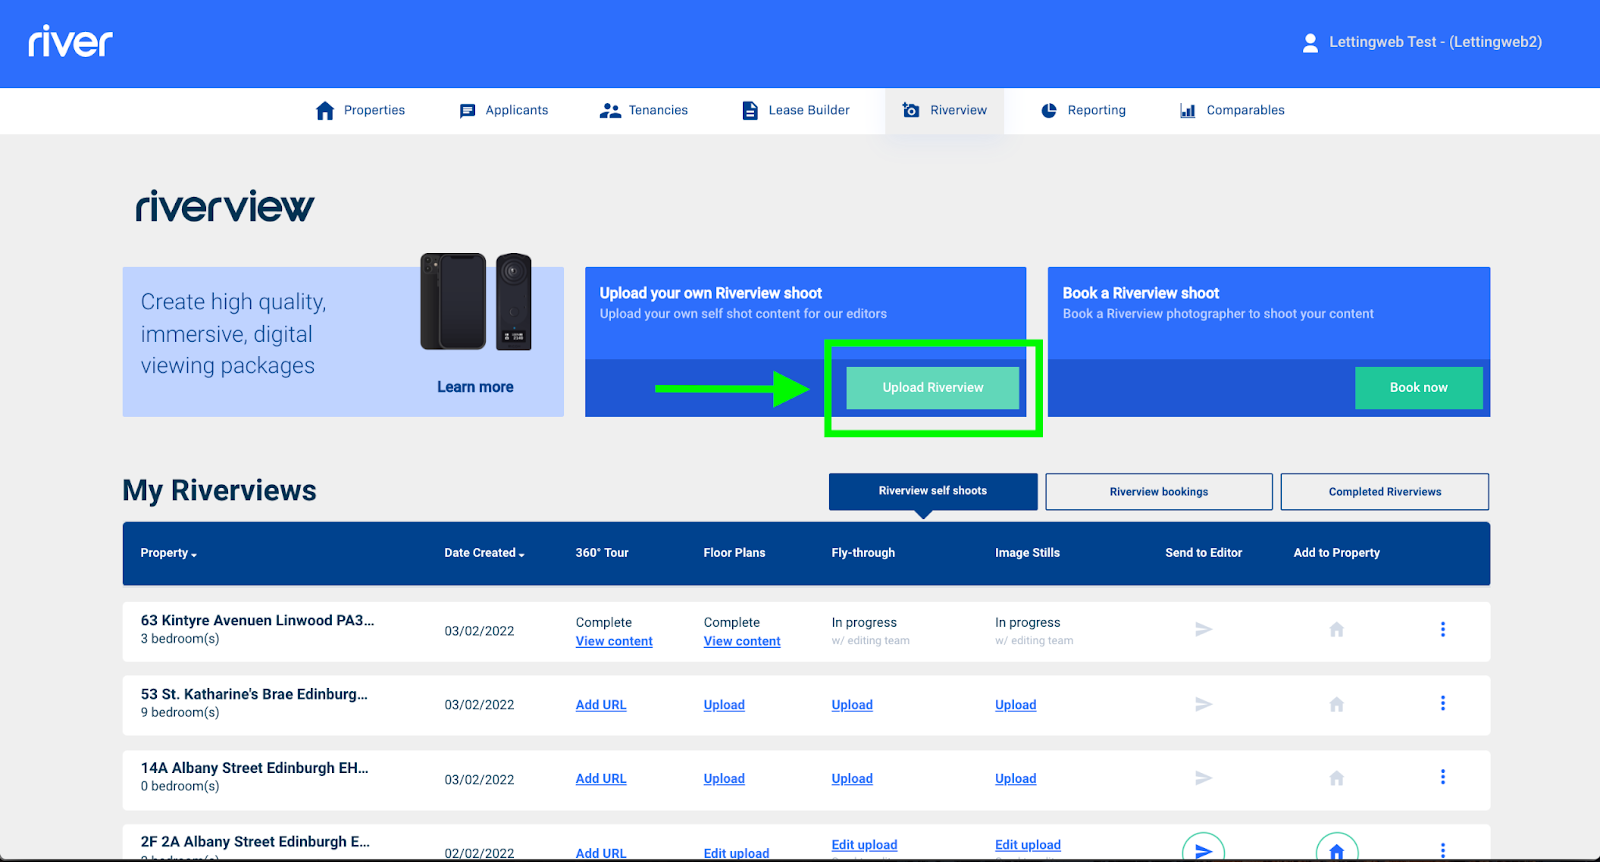
From your River dashboard, navigate to the Riverview tab and click the Upload Riverview button:
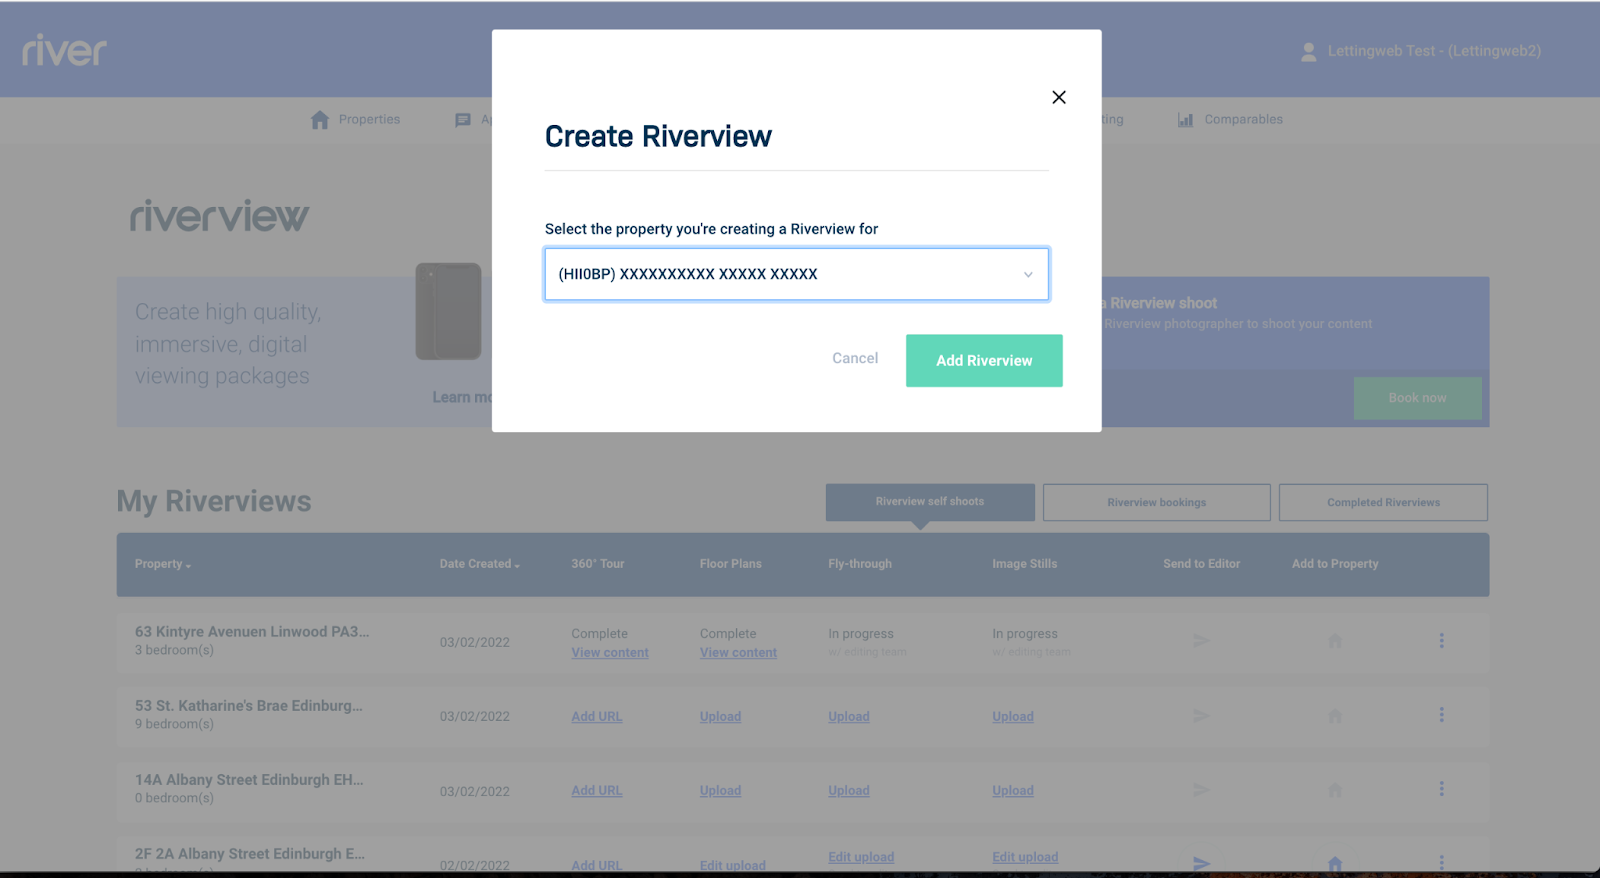
You will be prompted to either select one of your existing properties, or select Create new property and enter the property information directly. Once you have either selected an existing property or entered the details of a new property, click Add Riverview:
Step 2: Upload your content for editing
Once you have created a Riverview for your property, it will now appear in the Riverview self shoots tab.
To add your video flythrough and/or stills for editing, click Upload under the relevant column:
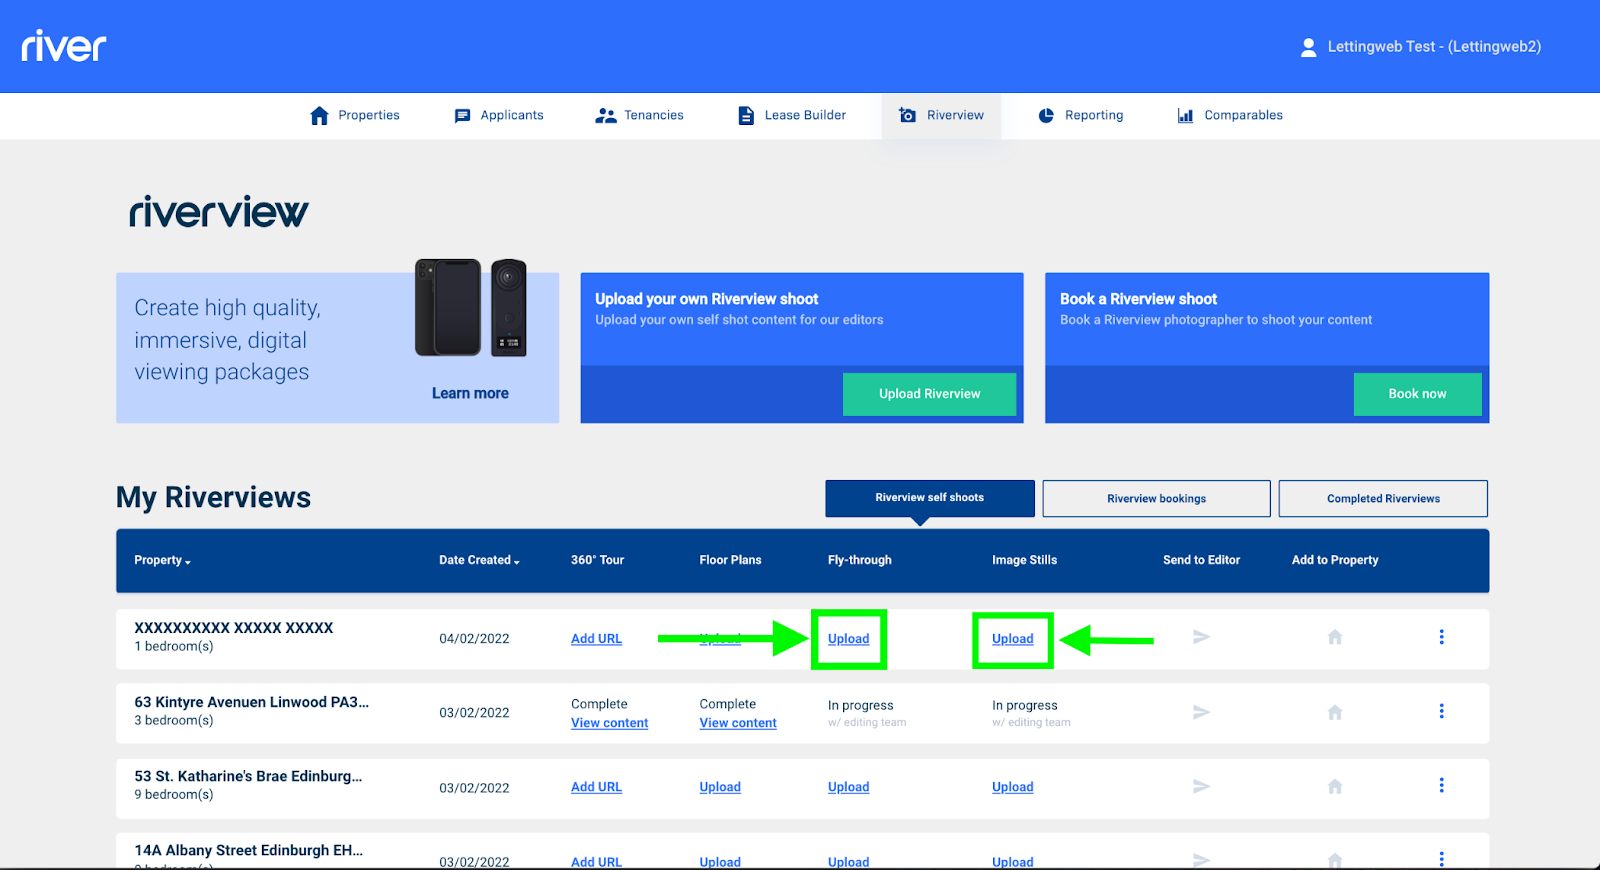
We will take care of the 360° virtual tour and floor plan, so there is no need to upload anything in these columns!
For the flythrough, click the Browse button, select the video on your device, and then click Upload content:
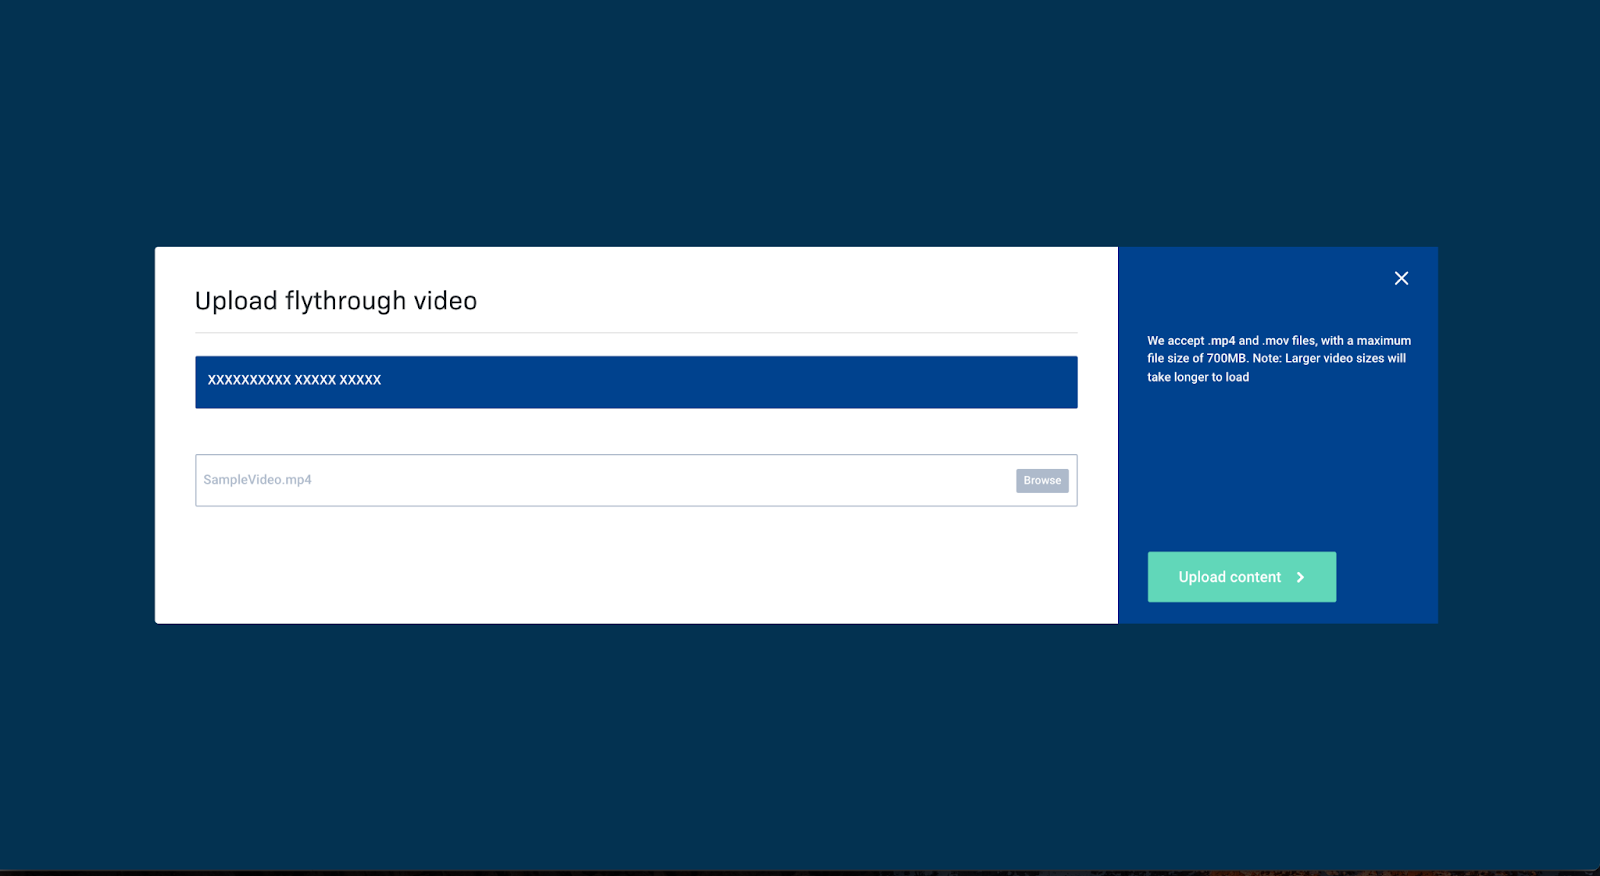
Please note, videos can take a while to upload and encode. Where possible aim to ensure the video file size does not exceed 500mb.
For the image stills, first decide whether you want to make use of our Blue Skies service. If you do, identify the images that could use a bit of sunshine and rename them as "Enhanced Editing 1", "Enhanced Editing 2", etc.
When your images are ready to upload, click the Upload button in the Image Stills column. From the screen that appears, click on the Browse button, select all of the still images that you want to include from your device, and then click Upload content:

If you want to make use of our Blue Skies service,
Step 3: Send your content to be edited
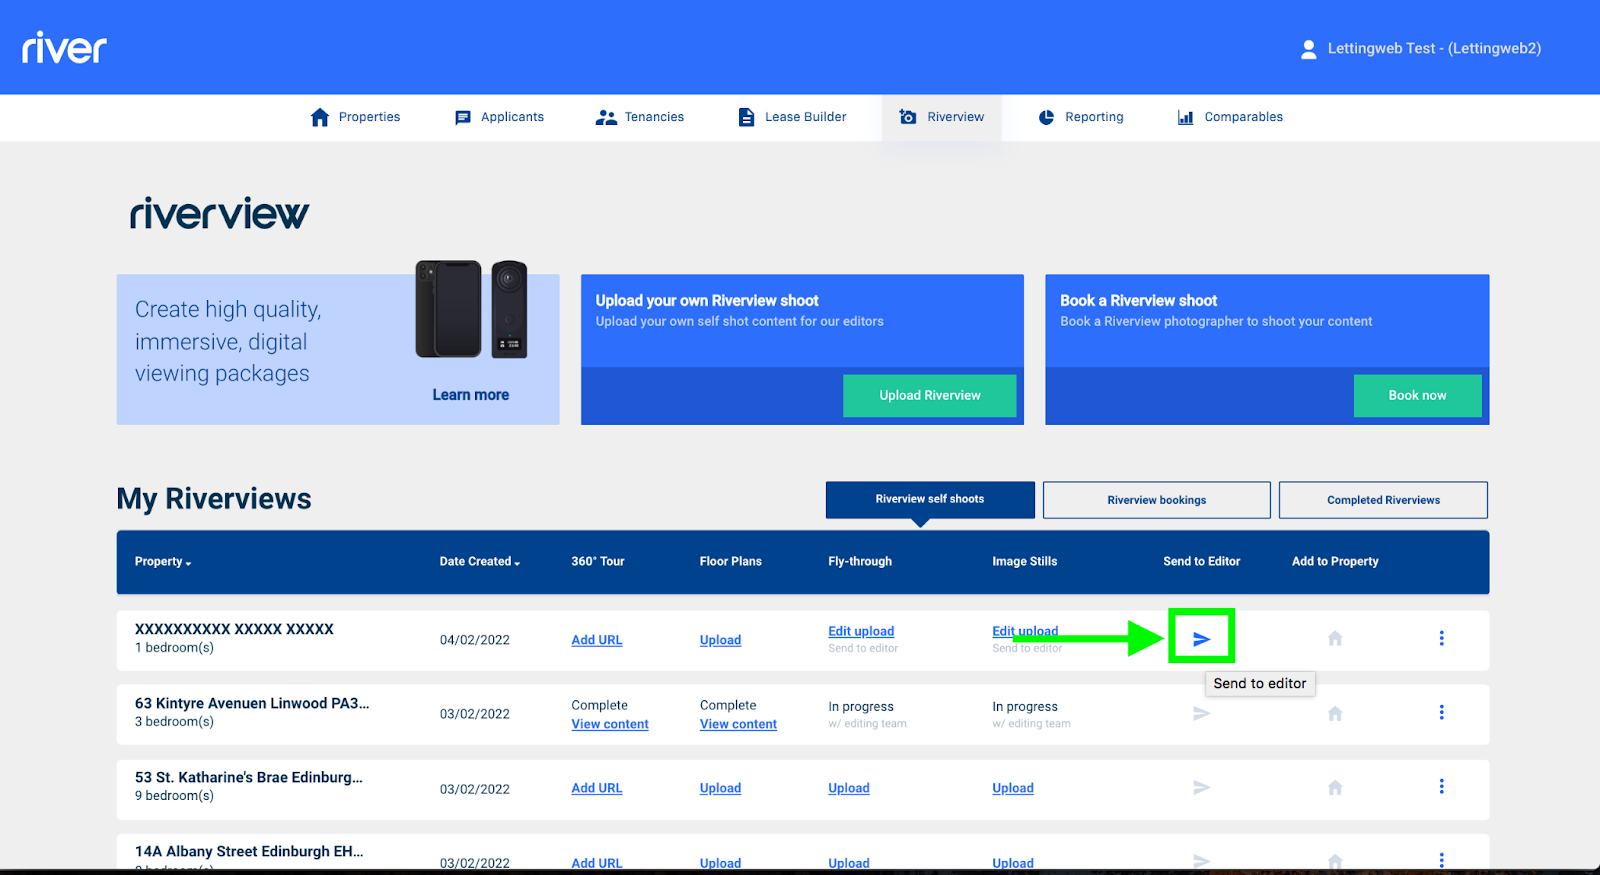
Once your fly-through and still images have been uploaded, it's time to pass them to us. Just click the ![]() icon in the Send to Editor column:
icon in the Send to Editor column:
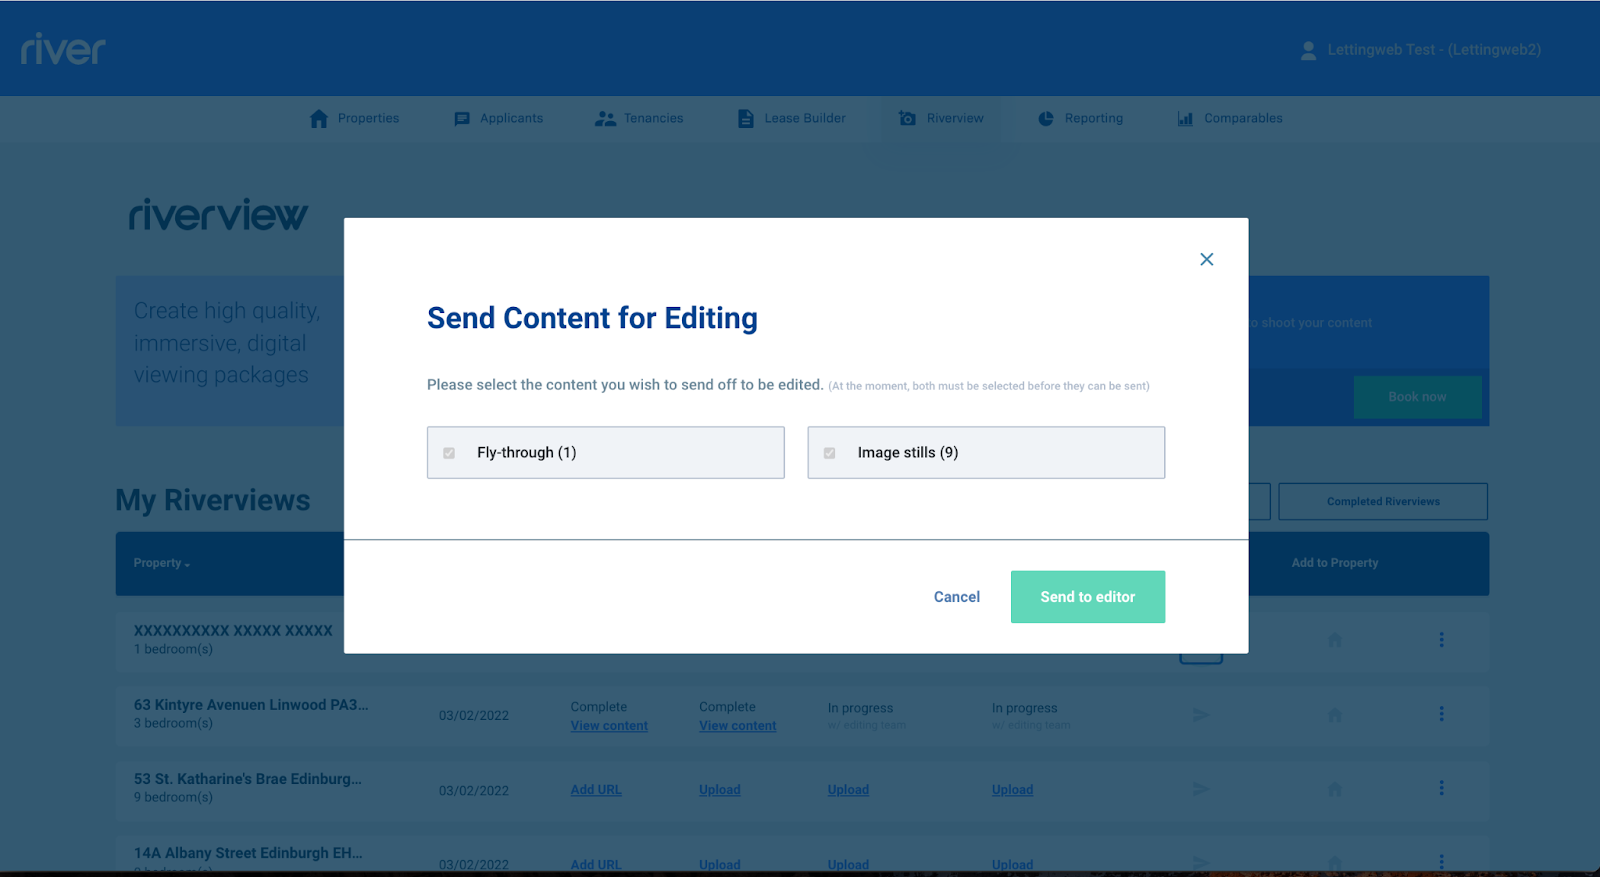
You will be shown a window confirming the content that you wish to send for editing. If everything looks right, click Send to editor to confirm:
You will receive a notification within 24 hours letting you know that your Riverview is finished and ready to publish.
Step 4: Add the completed Riverview to your listing
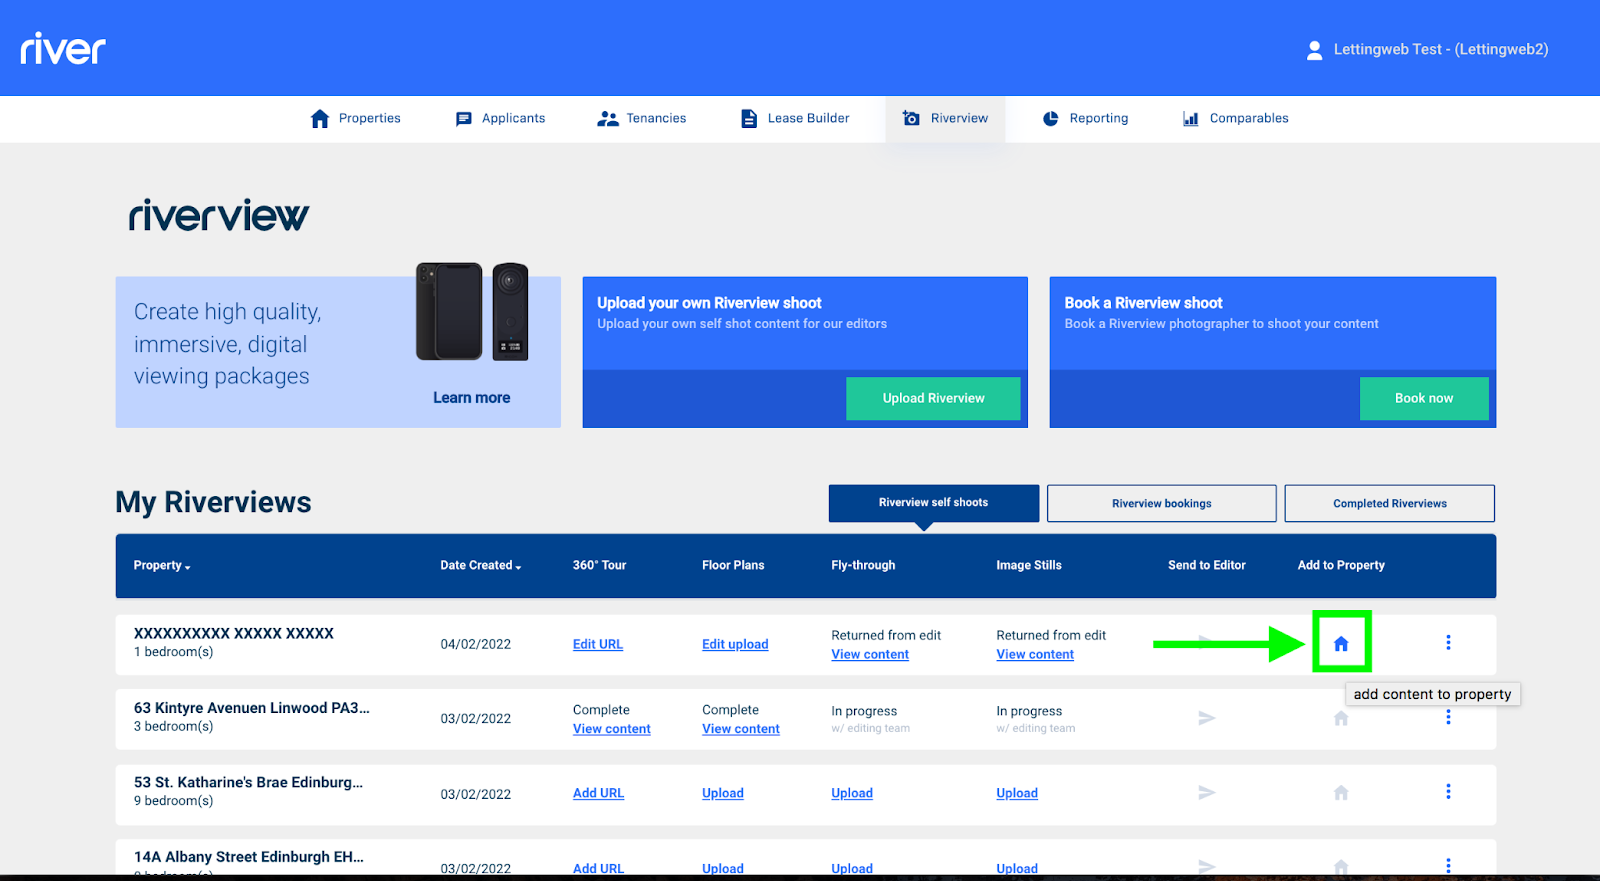
Once you've been notified that the fly-through and the video have been returned from editing, return to your Riverview dashboard, locate the property that you've been working with, and click the ![]() icon in the Add to Property column:
icon in the Add to Property column:
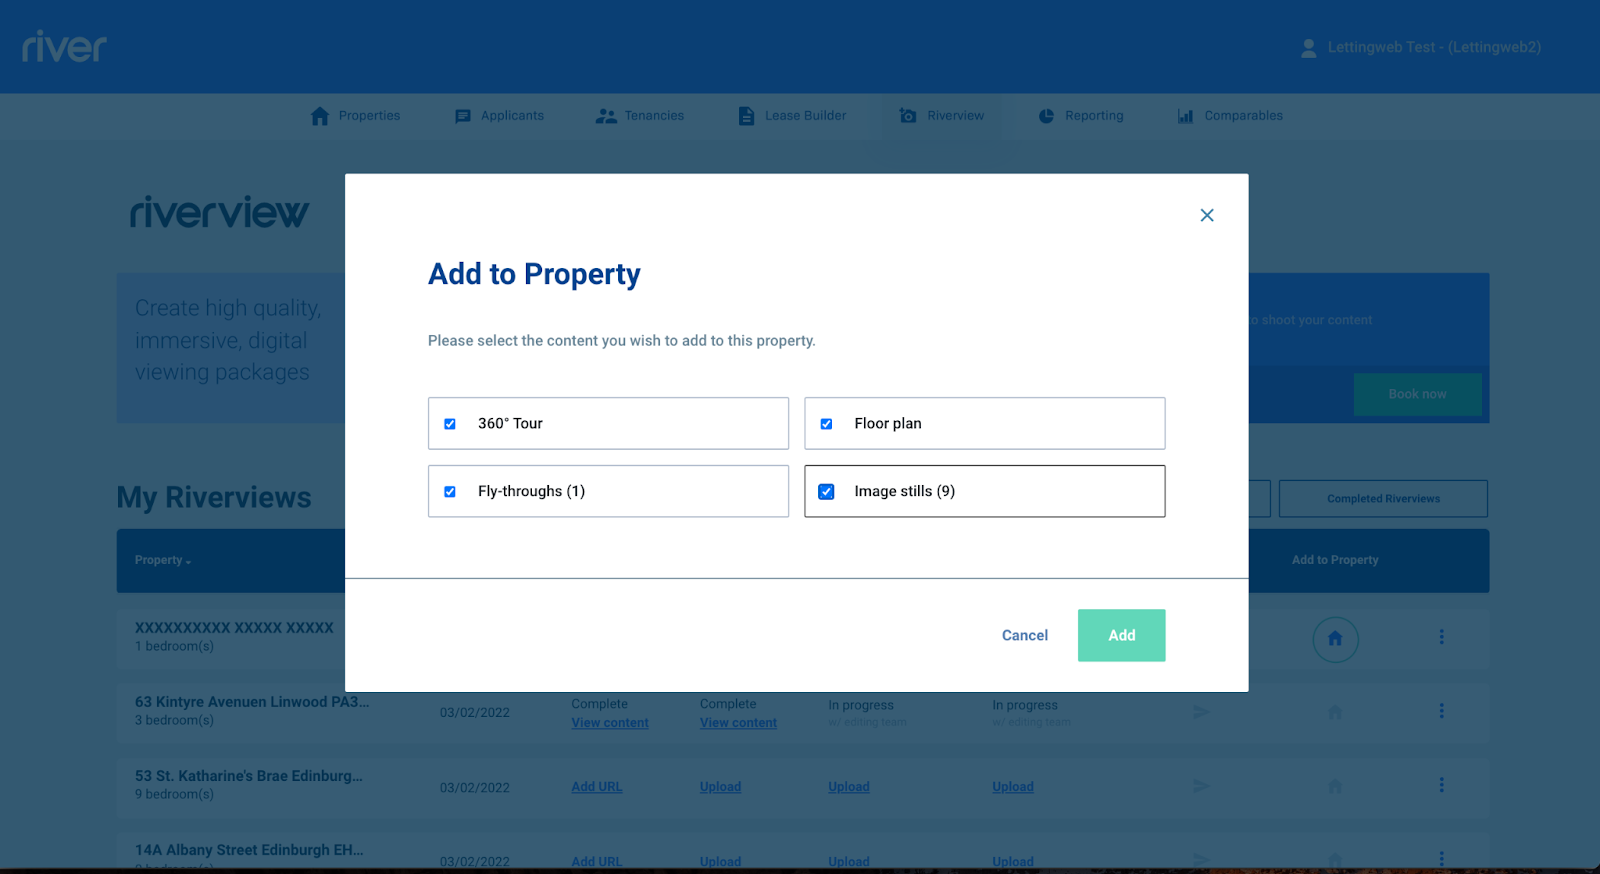
Select the content you wish to add to the property and click Add. To get the most out of your Riverview, we recommend selecting all of the available content!
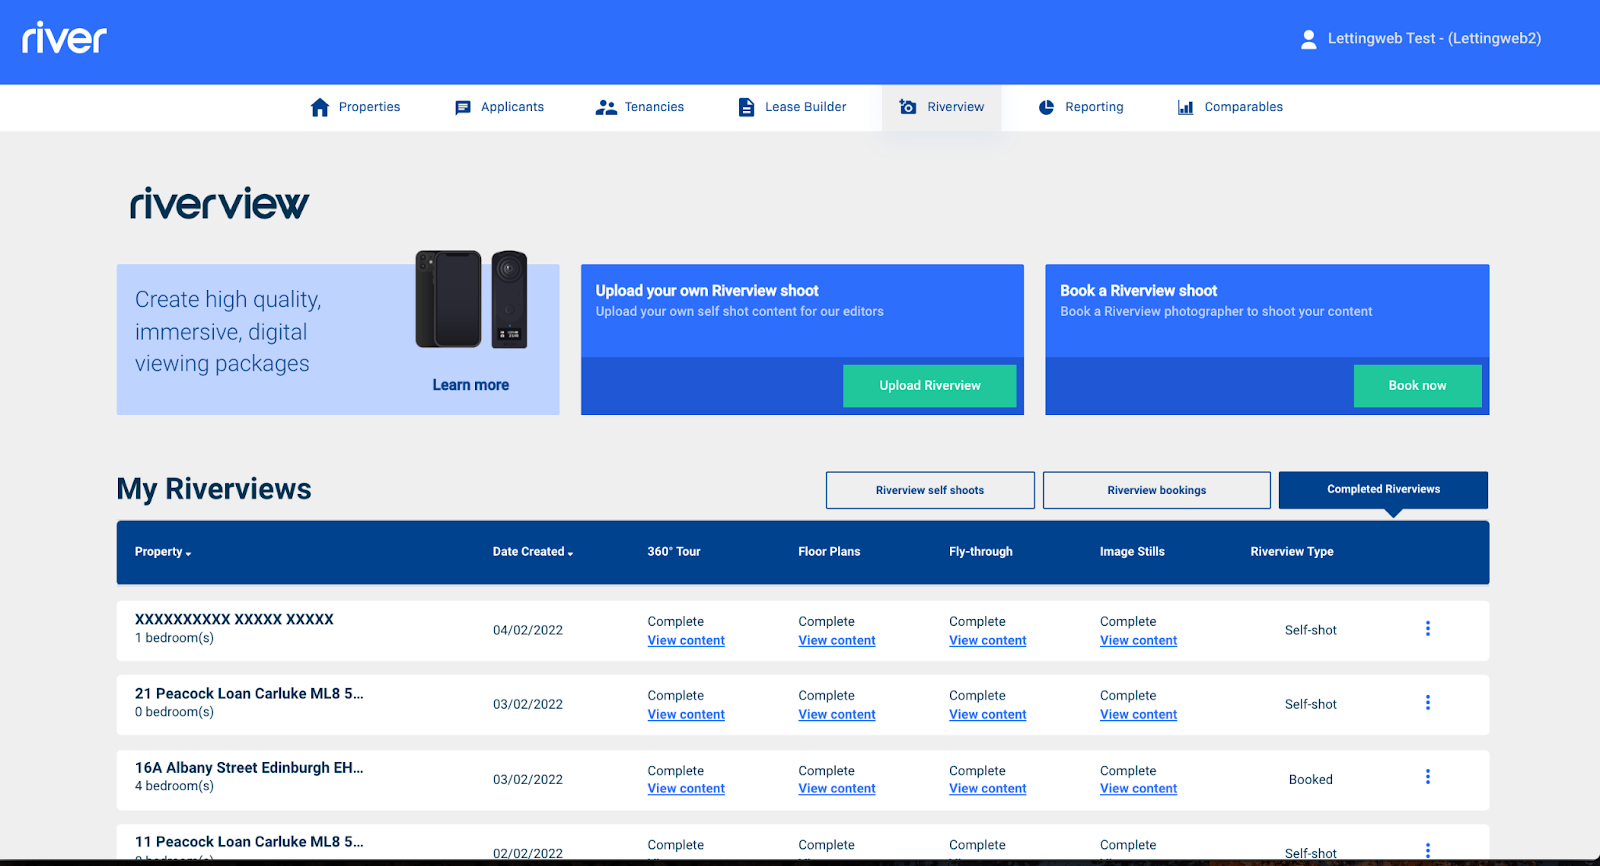
And you're done! The final shoot will now appear in the Completed Riverviews tab, and your Riverview will be automatically added to this property's listing across all of your connected property portals:
Comments
0 comments
Please sign in to leave a comment.