
Once you have grouped your applicants together and created a tenancy, you are ready to start building a lease. You have two options when creating a lease:
- You can build a lease from an existing property, which will populate the lease with the property and tenant information you have already collected. If you'd like to learn how to do this, click here.
- You can build a new lease from scratch, and you will have to populate the information yourself. Keep reading to find out how to do this.
How to build a lease from scratch
Accessing the Lease Builder
-
-
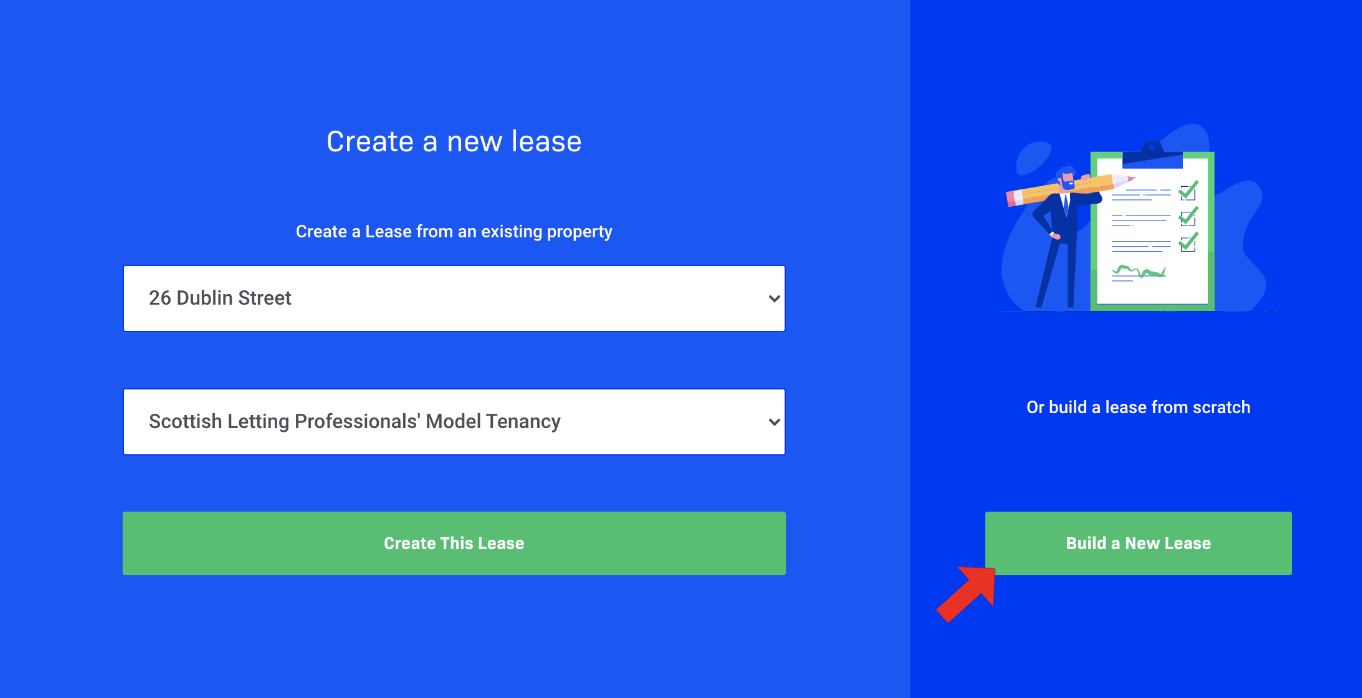
- When you login to your River dashboard, click Lease Builder.
- Click the Build Lease button in the left hand corner. A modal should now appear prompting you to create a new lease.
- Click Build a New Lease on the right hand side of the modal.
- Enter your lease name, start date, and select a template to work from. Click Create Lease.
-
Section 1: Property Details
- Check that the date that has pre-populated Section 1.1 is correct.
- Scroll to Section 1.2 and input your property details.
- Scroll to Section 1.3 and click Yes next to the respective row if you would like to note any additional extras on the lease. This could be something that is included or excluded from the property, such as parking or a communal garden.
- Scroll to Section 1.4 and click Yes if you would like to add any property specific terms.
- Click Save Property Details and scroll to the Tenants section.
Section 2: Tenants
- Add tenants in section 2.2 by populating their details and clicking the Add Tenant button.
- You can view all of your tenants in Section 2.1
- To check a specific tenant’s details, click the pencil icon.
- To delete a tenant altogether, click the trash icon.
- Once you are satisfied, scroll to the Landlord Details Section.
Section 3: Landlord Details
- Add a landlord in section 3.2 by populating their details and clicking the Add Landlord button.
- You can view your landlord in Section 3.1. To edit their information, click the pencil icon and enter the correct details. Click Edit Landlord Details to save this.
- If you’d like to delete the landlord, click the trash icon.
- In Section 3.3, select from the drop down which agent will sign the lease on behalf of the landlord.
- Scroll to the Rent & Deposit section.
Section 4: Rent and Deposit
- Fill out your rent information in Section 4.1 and click Save Rent Details.
- Enter a deposit amount in Section 4.2 and click Save Deposit Details.
- Scroll to the Guarantor section.
Section 5: Guarantor
- Click Show Guarantor Section to add any guarantors.
- Add a guarantor in section 5.2 by populating their details and clicking the Add Guarantor button.
- You can view your guarantors in Section 5.1. To edit their information, click the pencil icon and enter the correct details. Click Edit Guarantor Details to save this.
- If you’d like to delete a guarantor, click the trash icon.
- Scroll to the bottom of the lease.
Sending the Lease
- Before sending your lease, click the Download Preview button to check it over before sending the final document.
- When you are ready to send your lease, click Send Final Document. This will send the lease via DocuSign to your nominated agent and the tenant.

Comments
0 comments
Please sign in to leave a comment.